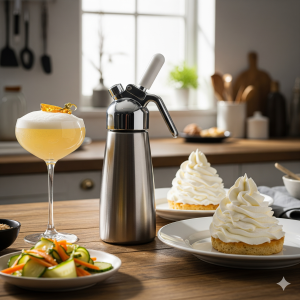

A whipped cream dispenser is a crucial tool for making light, airy whipped cream, foams, and other delights. Regular cleaning and maintenance are essential to ensure optimal performance and longevity. This guide will demonstrate the proper methods to clean and maintain your dispenser, ensuring it remains in excellent condition.
Why Cleaning Your Dispenser Is Important
Accumulation of residue from cream and other ingredients in your dispenser can cause blockages and unwanted flavors. Proper cleaning is essential to prevent these issues, ensuring clean and safe water, optimal performance, and an extended appliance lifespan.
What You’ll Need
Step-by-Step Cleaning Instructions
1. Disassemble the Dispenser
After using your whipped cream dispenser, disassemble it by separating the parts:
2. Rinse Immediately
Rinse each part under warm running water to remove cream residue. This prevents the cream from hardening and becoming difficult to clean later.
3. Clean the Parts
Use warm, soapy water and a soft cloth or sponge to clean the dispenser’s body, nozzle, and head.
4. Check for Blockages
Inspect the nozzle and valve for any clogs. If you notice residue, gently clean it with the brush. Avoid using sharp objects that could damage the parts.
5. Rinse Thoroughly
Rinse all parts under clean, running water to remove soap. Ensure no soapy residue is left, as it can affect the taste of your cream.
6. Dry Completely
Dry all parts with a soft cloth or allow them to air dry. Ensure the dispenser is completely dry before reassembling to prevent moisture buildup.
7. Reassemble the Dispenser
Once all parts are dry, reassemble your whipped cream dispenser, ensuring the gasket is properly seated, and the nozzle is securely attached.
Maintenance Tips
What to Avoid
Conclusion
Regular cleaning and upkeep of your whipped cream dispenser is key to achieving reliable performance and extending its service life. Adhering to these straightforward procedures will ensure that your dispenser remains in optimal condition, always prepared to produce delightful treats on demand.
Take care of your dispenser, which will take care of your desserts!
Ready to elevate your baking? Explore our range of cream chargers and dispensers to get started today!